
Six Colours, Six Lanes, Six Different Races Within a Race
Every greyhound race is a six-way chess match that starts the moment the trap assignments are drawn. Before a single dog leaves the boxes, the blanket colours are already shaping how the race will unfold — which dogs get the inside rail, which ones face traffic on the bend, and which are drawn wide enough to run their own race entirely.
In UK greyhound racing, the six traps are numbered one through six, each assigned a specific blanket colour regulated by the Greyhound Board of Great Britain (GBGB Rule 118). This is not decoration. The colour system exists so that punters, track staff, and commentators can instantly identify every dog’s position from the moment the traps rise to the moment the first nose crosses the finish line. At the speed these dogs run — often covering 480 metres in under 29 seconds — visual identification without colour coding would be nearly impossible.
What makes trap draw genuinely interesting from a betting perspective is that the number itself carries tactical weight. A confirmed railer drawn in trap six faces a fundamentally different race than if it were drawn in trap one. The same dog, same form, same fitness — but a different trap can mean a different result. Understanding what each trap colour represents, and more importantly what each trap position demands from a dog, is one of the simplest edges a punter can build into their analysis.
The Six Trap Colours and Their Numbers
Trap 1 red, Trap 2 blue — and it goes deeper than just the blanket. The colour system has been standardised across every licensed GBGB track in the UK (GBGB), meaning a dog in a red jacket at Romford is running from the same position as a dog in red at Towcester or Perry Barr. There is no ambiguity, no track-specific variation. The colours are universal.
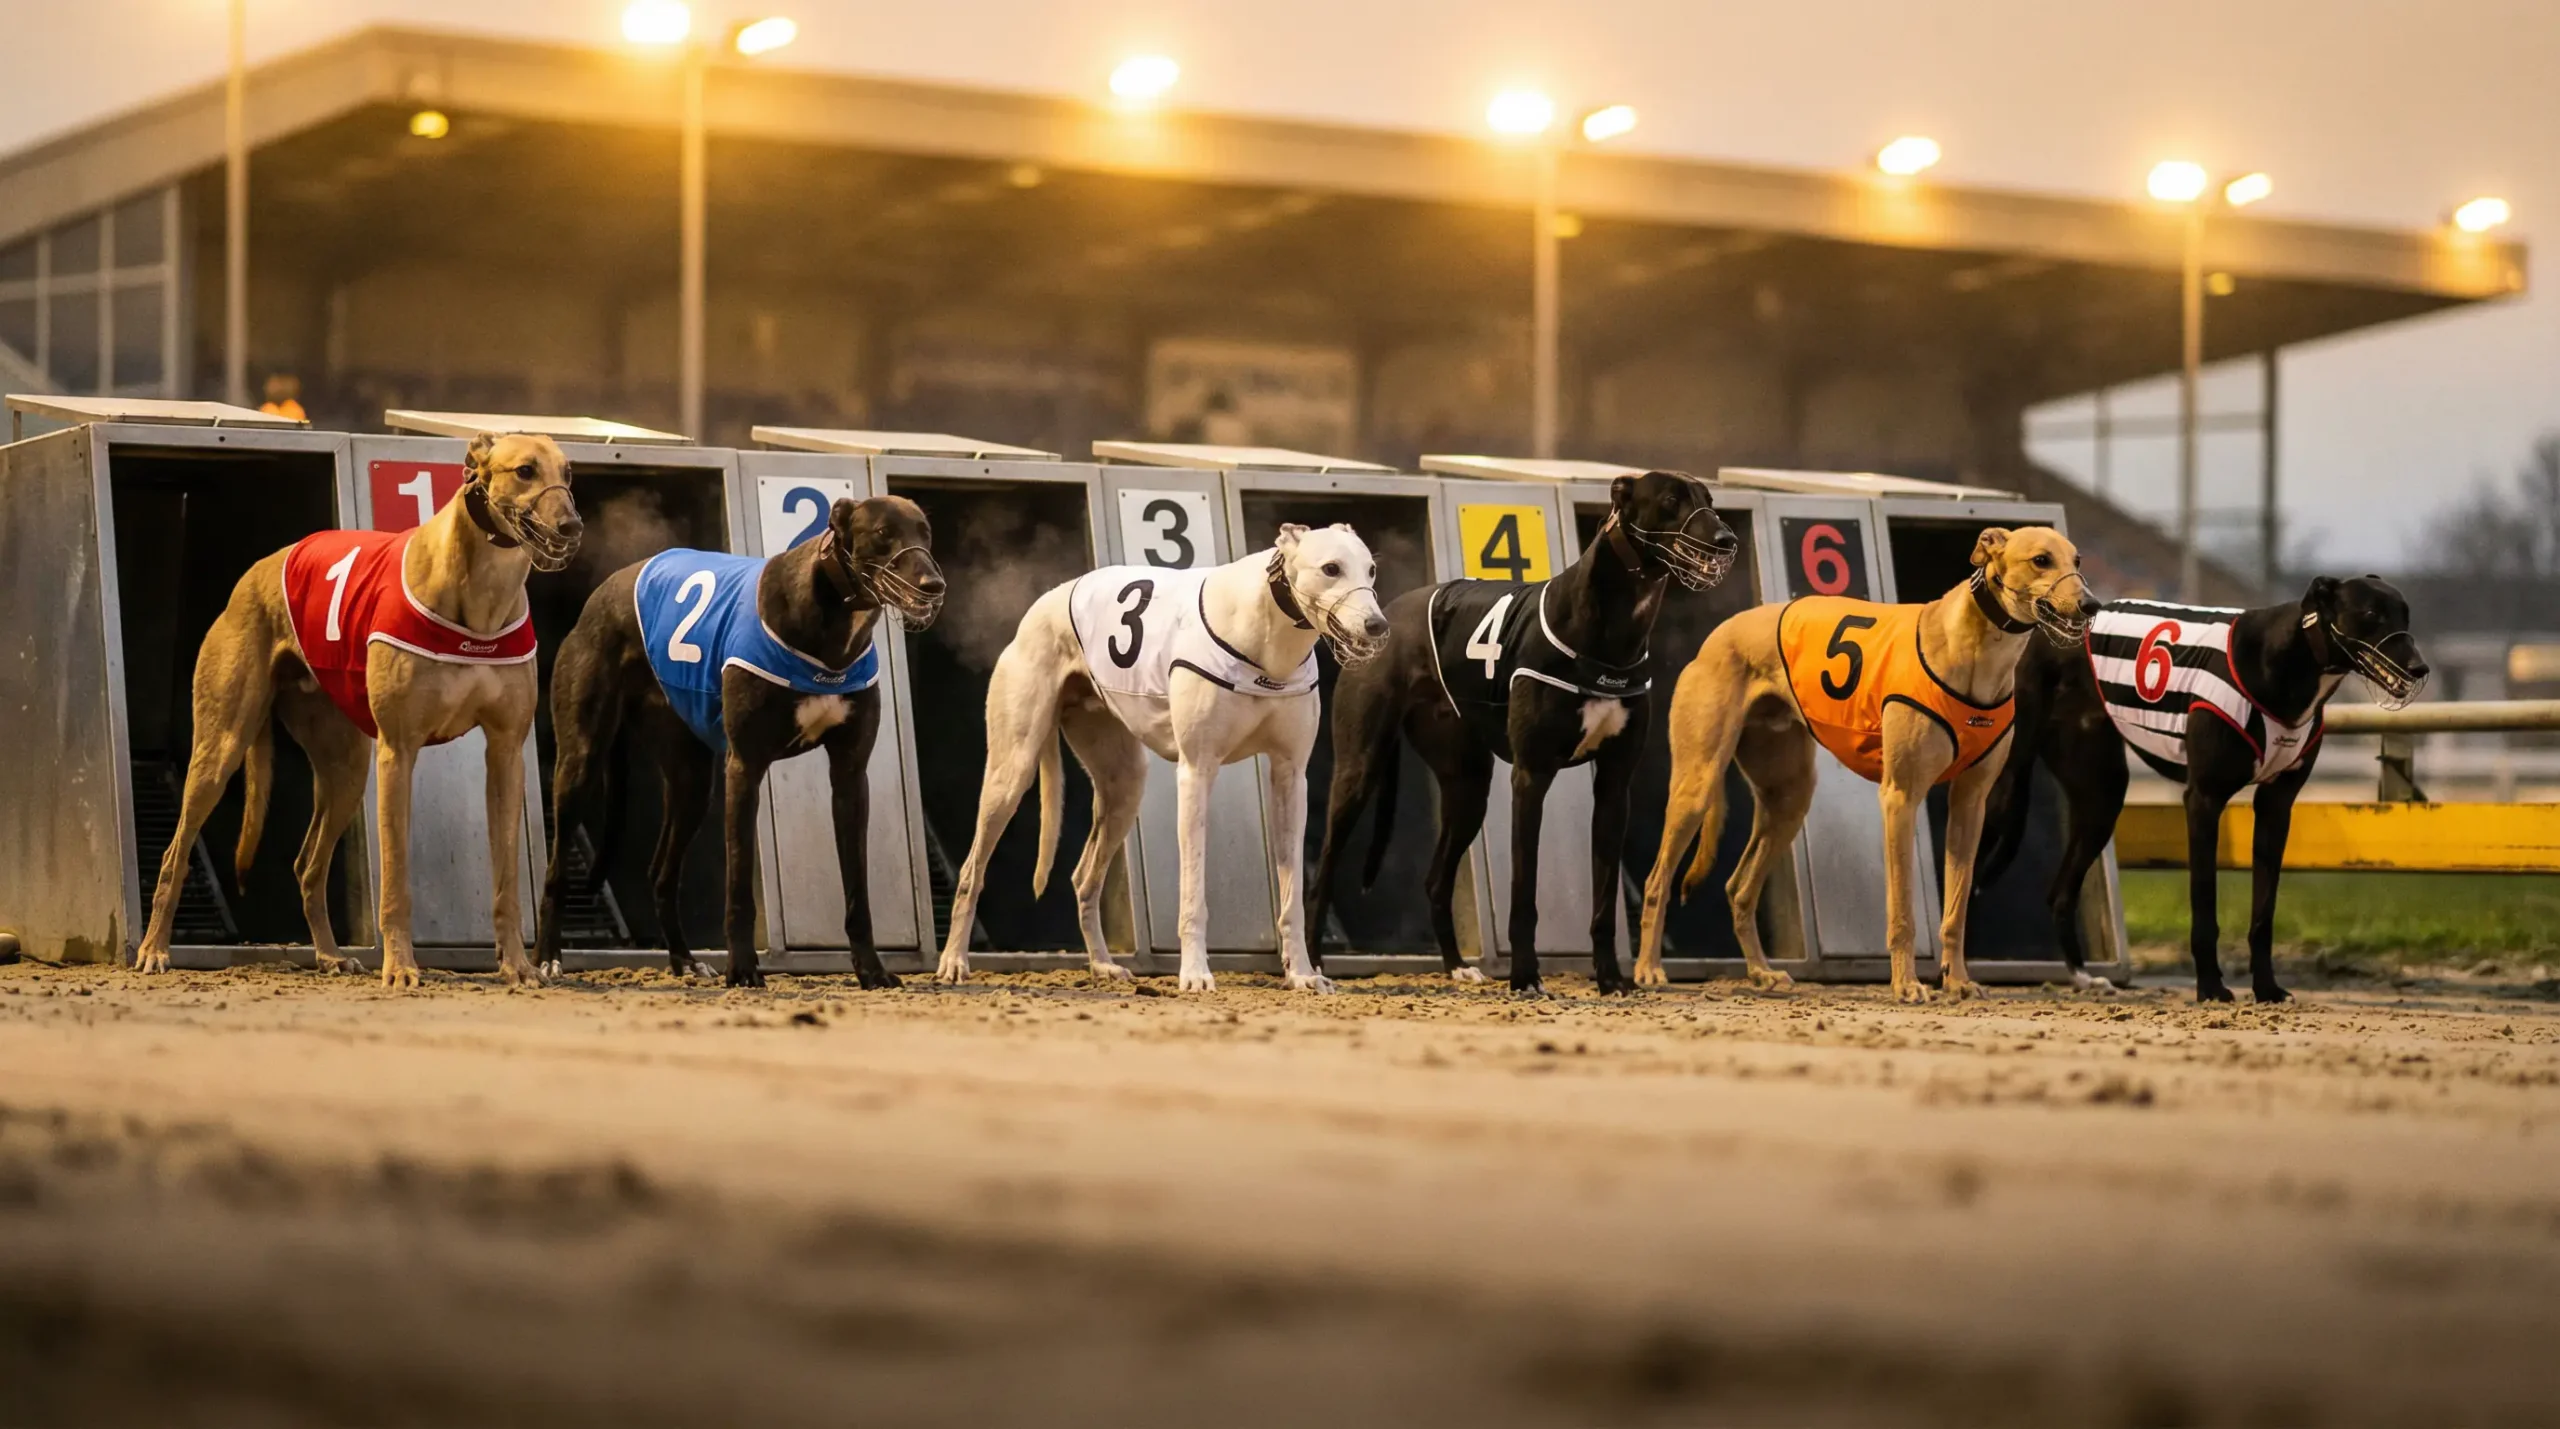
Here is the full breakdown (GBGB Rule 118). Trap 1 wears red. Trap 2 wears blue. Trap 3 wears white. Trap 4 wears black. Trap 5 wears orange. Trap 6 wears black and white stripes. In races that carry a reserve runner — typically marked with an R on the racecard — the reserve wears the jacket corresponding to the trap number it takes, with an additional letter ‘R’ prominently displayed on each side (GBGB Rule 118). Reserves only run if a dog is withdrawn before the off.
At the track, these colours are visible from the moment the dogs enter the parade ring. On screen, whether you are watching via a bookmaker’s live stream or a SIS broadcast, the colours are replicated in the on-screen graphics. The racecard itself will list dogs by trap number rather than colour, but once you have the six-colour sequence memorised, the visual link between card and race becomes automatic. Most regular punters internalise this within a few meetings — red inside, stripes outside, everything else in between.
One detail worth noting: the blanket colour does not indicate anything about the dog’s quality, grade, or recent form. It is purely positional. A trap 1 dog in an A1 open race wears the same red jacket as a trap 1 dog in a D4 graded affair. The colour tells you where the dog starts. Everything else — whether that starting position is an advantage or a problem — depends on the dog’s running style and the track geometry.
On television and in live streams, commentators will frequently refer to dogs by colour rather than name during the running. You will hear phrases like “the red dog leads into the first bend” or “the stripes are closing on the outside.” If you are following a race without a card in front of you, knowing the colour sequence is the only way to track your selection in real time.
How Trap Position Affects Race Outcomes
Inside rail or wide draw — the trap number is the first variable a punter should assess. It sounds reductive, but the geometry of greyhound racing makes trap position disproportionately important compared to most other sports. The reason is simple: bends. Every UK track features either two or four bends, and the dog closest to the inside rail on the first bend covers less ground than the dog on the outside. Over a 480-metre race, the difference between rail and wide can amount to several lengths — and several lengths is often the margin between first and fourth.
Trap 1 and trap 2 are the inside draws. Dogs drawn here have the shortest path to the first bend and, if they break cleanly, the best chance of securing the rail position early. This is why confirmed railers — dogs whose natural running style takes them towards the inside — tend to perform best from low trap numbers. A railer drawn in trap 1 can break, hug the rail through the bend, and maintain position without expending extra energy fighting for room. The same dog drawn in trap 5 or 6 has to cross the entire width of the track to reach the rail, and by the time it gets there, the bend is already upon it.
Traps 5 and 6 are the wide draws. Dogs drawn here need a different profile entirely. A wide runner — a dog that naturally takes a path around the outside of the pack — can actually benefit from a high trap number. It gives them clear space to stride without interference, and if they have enough early pace to lead into the bend from the outside, the wider arc becomes less of a disadvantage. The classic trap 6 winner is a dog with blistering early speed that can cross over to the front before the first bend and dictate the race from there.
The middle traps, 3 and 4, are where things get unpredictable. Dogs drawn here face the most traffic. They are too far inside to comfortably run wide, and too far outside to guarantee the rail. Middle-trap dogs often get squeezed on the first bend, bumped between faster starters on either side. This is why you will frequently see form comments like “Bmp1” or “CkRn” attached to dogs drawn in traps 3 and 4 — they are the positions most susceptible to crowding trouble.
Track-specific differences amplify all of this. At a tight track like Romford, where the bends are sharp and the straights are short, inside draws carry even more weight. At a wider track like Towcester (Towcester Racecourse), the bends are more generous and outside runners have more room to operate. A dog that struggles from trap 6 at one track might handle it perfectly well at another. This is why blanket trap bias analysis — “trap 1 always wins” — is unreliable. The data needs to be track-specific to mean anything.
Using Trap Draw Information in Your Betting
A dog in the wrong trap is a dog with a problem — and that is either a risk or an opportunity. The practical application of trap draw analysis comes down to one question: does this dog’s running style suit the trap it has been given? If the answer is yes, the draw is neutral or positive. If the answer is no, you need to decide whether the market has already priced that disadvantage in.
Start with the dog’s trap history. Most form guides and racecards show recent runs with the trap number included. If a dog has won twice from trap 2 and finished mid-pack from trap 5, you are looking at a dog with a clear inside preference. Drawing trap 1 or 2 again is a positive signal. Drawing trap 6 is a red flag — not necessarily fatal, but a factor that should lower your confidence.
The next step is comparing the dog’s preferred style to the current draw. Check whether the dog is recorded as a railer, a wide runner, or a mid-track runner. This information appears in form comments and in some databases as a running style tag. A railer drawn in trap 6 has to work across the pack to find the rail, which costs energy and time. A wide runner drawn in trap 1 might break well but then drift outward on the bend, creating a path that is longer than necessary. Neither scenario is impossible to overcome, but both introduce friction.
Where this becomes genuinely useful for betting is in spotting value. When a strong dog draws an unfavourable trap, its price often drifts. The market knows the draw is bad, and casual punters back away. But if the dog has enough raw ability to overcome the draw — if it has the pace to lead from any box, or the tactical intelligence to find a gap — then the drifted price represents an overlay. You are getting better odds than the dog’s true chance warrants, specifically because the draw has scared off less attentive money.
Conversely, a moderate dog that draws its ideal trap can be overbet. If a dog has won its last two from trap 1 and draws trap 1 again, the market tends to compress the price further than the dog’s ability alone justifies. In those situations, the value might actually sit with the less obvious selection — perhaps a better dog drawn slightly wider that the market has discounted too aggressively.
One final point: trap draw matters most in sprint races and least in longer staying events. Over 480 metres with four bends, there is enough time for positions to settle and for better dogs to overcome a poor draw. Over 270 metres with two bends, the first three seconds off the trap often decide the entire race. Factor the distance into your draw analysis accordingly.
The Blanket Tells the Story Before the Traps Open
Trap colour is the first piece of information you see — make sure it is not the last piece you think about. The six-colour system is simple enough that any newcomer can learn it in five minutes, but the tactical implications of trap position take considerably longer to internalise. The colour on the blanket tells you where a dog starts. What you do with that information is what separates a punter from a spectator.
The most consistent edge available in trap analysis is not a universal rule — it is pattern recognition applied to specific tracks. A dog that consistently runs well from trap 1 at Hove is telling you something about its style and that track’s geometry. A dog that performs regardless of draw is telling you something about its raw quality. Both pieces of information have value, but they lead to different types of bet.
Before the traps rise, every dog is standing still in a numbered box wearing a coloured jacket. That is the first frame of the race. The punter who has already thought about what that frame means — rail advantage, wide draw risk, middle-trap traffic — is the one who has done the work that most skip entirely. Trap colour is basic. Trap analysis is not.
Find more race guides at greyhoundresultsyester.
Also read our greyhound trap bias.